Monday, February 28, 2022

Special Moments Bookbinding Triangle Fancy Fold


Stampin' Up! Products
  • Fresh Freesia
  • Basic Black
  • Basic White
  • Soft Succulent cardstock
  • Friendly Hello Designer Series Paper
  • Friendly Hello and Special Moments stamp sets
  • Memento Tuxedo black ink
  • Rhinestones
  • Dimensionals

Saturday, February 26, 2022

You Are Loved


Stampin' Up! Products
  • Mossy Meadow cardstock
  • Basic White cardstock
  • Flirty Flamingo cardstock
  • Fine Art Floral Designer Series Paper
  • Rich Razzleberry ink
  • Layering Oval dies
  • Itty Bitty Accents punch
  • Sprig punch (non SU)
  • Pearl Basic Jewel
    • Dyed with Night of Navy Stampin' Blends


Thursday, February 24, 2022

Blooms in Leaves - Modified Gate Fold Card


Stampin' Up! Products
  • Mossy Meadow cardstock
  • Petal Pink cardstock
  • Very Vanilla cardstock
  • Designer Series Paper
  • Botanical Prints, Friendly Hello and Thoughtful Blooms stamp sets
  • Memento Tuxedo black ink
  • Lovely Flower Edgelits and Stitched So Sweetly dies
  • Small Bloom punch
  • Pearl Basic Jewels
    • Three small pearls dyed black
  • Dimensionals
I used a Brother Scan N Cut machine to die cut the leaves.


I took Connie Stewart's Gate Fold Card and made it my own. If you are a blog follower you know I prefer using more layers on my card. Check out Connie's YouTube HERE.

Tuesday, February 22, 2022

SHOW OFF - Part 2

Show off your beautiful Designer Series Paper

Stampin' Up! Products
  • Night of Navy cardstock
    • Card base measures 5 1/4" x 5 1/2"
      • Scored at 1"
    • Scrap for fern
  • Misty Moonlight cardstock
    • Scrap for fern
  • Very Vanilla cardstock
    • Card layer measures 3/4" x 5 1/4"
    • Card layer (inside) measures 4" x 5 1/4"
    • Circle is approximately 2 3/8"
    • Scrap for fern and base
  • Boho Indigo Medley Designer Series Paper
    • Card layer measures 5 1/8" x 5 1/8"
      • Cut a layer measuring 5/8" x 5 1/8" from this piece
      • Cut next layer measures 3 7/8" x 5 1/8"
      • Remaining card layer (inside) measures 5/8" x 5 1/8"
  • Boho Vases and Party Pants stamp sets
  • Night of Navy ink
  • Boho Indigo and Layering Circle dies
  • Very Vanilla Taffeta 1/4" ribbon
  • Dimensionals


Friday, February 18, 2022

Bouquet of Hope


Stampin' Up! Products
  • Very Vanilla cardstock
    • Card base measures 8 1/2" x 5 1/2"
      • Scored at 4 1/4"
    • Card layers measures 3 7/8" x 5 3/8" (cut two)
      • Front and inside
    • Scrap for sentiment
  • Evening Evergreen cardstock
    • Scrap for flowers
  • Soft Succulent cardstock
    • Card layer measures 4" x 5 1/4"
    • Scrap for sentiment mat
  • Bouquet of Hope stamp set
    • Paper Pumpkin - February 2021
  • Soft Succulent ink
  • Layering Ovals, Lasting Elegance and Stitched So Sweetly dies
  • Itty Bitty accent punch
  • Pearl Basic Jewels

Wednesday, February 16, 2022

Show Off! - Part 1

Show off your Stampin' Up! Designer Series Paper

Show off your beautiful Designer Series Paper

Stampin' Up! Products
  • Rich Razzleberry cardstock
    • Card base measures 5 1/4" x 5 1/2"
        • Scored at 1"
    • Scrap for butterfly 
  • Sweet Sugarplum cardstock
    • Card layer (inside) measures 5/8" x 5 1/8"
    • Scrap for butterfly
  • Whisper White cardstock
    • Card layer (inside) measures 3 7/8" x 5 1/8"
    • Scrap for sentiment
  • Petal Garden Designer Series Paper
    • Card layer measures 4 3/4" x 5 1/4"
      • Cut a layer measuring 3/4" x 5 1/4" from this piece
      • Remaining layer measures 4" x 5 1/4"
    • Card layer (inside) measures 1/2" x 5 1/8"
    • Scrap for sentiment mat
  • Botanical Prints stamp set
  • Rich Razzleberry ink
  • Brilliant Wings dies
  • Oval and Scallop Oval punches
  • Pearl Basic Jewels
  • Sequins
  • Dimensionals

Monday, February 14, 2022

A Happy Valentine's Day Present for You - Beth's Top Ten Tips

I have found the following the best tips I can pass on as a card maker.
  • Die-cutting cutting pads, two pads + a little extra time = NO WARPING!
    • Use one pad as the bottom pad - where the die cuts into the pad
    • Use one pad that NEVER gets die cut into, label it DO NOT CUT
    • Every other pass through your die cut machine, rotate and flip your pads. Don't switch pad positions, just flip and rotate the pads. 
    • EVERY OTHER PASS THROUGH is the key.  Yes it takes time, but so worth the money. Now you have more money to spend on Stampin' Up! Products.  You're welcome!
  • Cutting your 12" x 12" Designer Series Paper
    • If you need a 3 7/8" layer for one card, cut the DSP at 4" x 12". It is more likely you will use the remaining 4" piece on another project.
    • If  you need a 2 7/8" layer for one, cut the DSP at 3" x 12". It is more likely you will use the remaining 3" piece of another project
  • Storing your Designer Series Paper with scraps
    • Before opening your DSP, loosely apply clear packing tape as indicated here. Wrap it around the back just 2" on each side. This allows you to keep your DSP together along with the scraps in the original package. Keep the thicker white cardstock that your DSP comes in for stability while it is stored. I place scraps smaller than 12" x 6" pieces in the back behind the thicker white cardstock.
    • I also tape my 8 1/2" x 11" cardstock this way
    • Create a file type label with any punch you have.  Attach it to a 12" x 12" piece of heavy cardstock. My DSP is filed alphabetically in an armoire. 


  • Color Combinations
    • Check the back of a package of SU DSP, the colors that coordinate well are listed there. You don't have to use the DSP to know what colors coordinate.
    • Color Coordinating for Dummies - my favorite website, Create, Ink, Color Lab
  • Know What You Have
    • Create a digital document with digital pictures of your stamps and dies
    • Add in descriptions
    • Use the "search" feature in that document
    • Check out one page of my stamp inventory HERE
  • Stampin' Up! now includes a reverse image of the stamp set on the inside of their cases. Make all your older stamp cases look the same!
    • I use to save the left over rubber in the case so it was easy to make sure I had returned all the stamps to the case.  Doesn't work for the new stamps. I needed an easy way to insure that I placed all the stamps back.  I scanned the front of the Stampin' Up! image sheet and flipped the picture so I could insert it into the back of the case.  Added my stamps, and WOW I'm a genius! Some computer skills are necessary. The step by step picture tutorial can be downloaded HERE.
  • Cling Mount Stamp Labels - Don't throw away the scraps.
    • The new Stampin' Up! cling mount stamps now STAY on your acrylic blocks.  Why not make your older Clear Mount stamps STAY by using the scraps?! 
  • Try Before You Buy Make
    • Use some of your long forgotten DSP that you really don't like but can't part with, use it to create samples. 
    • When I challenge myself to make fun fold cards, I also use scrap cardstock and pattern paper.  I design the layout and cut my cardstock.  If I like a style, I write down the card measurements and keep them together for future use.  Look at the messy way I keep this tip.

  • Ribbon Embellishments - Do you struggle like I do making your ribbon embellishment behind a sentiment?
    • I use Press'n Seal to create ribbon and flower layout designs.  Simply create your ribbon zigzag, with the sticky side down of the Press'n Seal, apply that to your ribbon.  Apply adhesive to where you want to place the embellishment and press your work onto your card.  Gently pull back the Press'n Seal and presto - truly a work of art.
 

  • Getting it Straight
    • Place a Silicone Craft Sheet on top of the  layer to prevent adhesive such like Dimensionals from being placed crooked on your card.  Move the craft sheet as you slowly attach the card layer


Saturday, February 12, 2022

The Bookbinding Triangle Fancy Fold


Stampin' Up! Products
  • Very Vanilla Thick cardstock
  • Basic Gray cardstock
  • Very Vanilla cardstock
  • Simply Elegant Designer Series Paper
  • Flourishing Phrases stamp set
  • Memento Tuxedo black ink
  • Decorative Label
  • Black jewels
  • Mini Dimensionals

The tutorial is only available with a $25 or more Stampin' Up! product purchase using my Hostess Code. My Hostess Code can be found at the top right of blog (desktop version).  EMAIL me if you are having trouble finding my current Hostess Code.


Tuesday, February 8, 2022

Quick and Easy Note Cards


Stampin' Up! Products
  • Whisper White Thick cardstock
    • Card base measures 5" x 7"
      • Scored at 3 1/2"
  • Rococo Rose cardstock
    • Card layer measures 4 3/8" x 2 7/8"
  • Whisper White cardstock
    • Card layer measures 4 1/4" x 2 3/4"
  • Delicate Dahlias stamp set
  • Memento Tuxedo black and Rococo Rose inks
  • Stamparatus
  • Pearl Basic Jewels

Sunday, February 6, 2022

Valentine Duo


Stampin' Up! Products
  • Calypso Coral cardstock
    • Card base measures 5 1/2" x 8 1/2"
      • Scored at 4 1/4"
    • Scrap for flower
  • Basic White cardstock
    • Card layer (inside) measures 5 1/4" x 4"
    • Finished banner measures 3 3/8" x 1/2"
  • Gold Foil sheet
    • Scrap for heart
  • Melon Mambo cardstock
    • Card layer measures 5 1/4" x 4"
    • Card layer (inside) measures 1/2" x 4"
    • Finished banner measures 3 1/2" x 5/8"
    • Scrap for flower and heart
  • Rich Razzleberry cardstock
    • Scrap for flower and heart
  • Painted with Love Designer Series Paper
    • Card layer measures 5 1/8" x 3 7/8"
    • Card layer (inside) measures 3/8" x 3 7/8"
  • Shaded Summer stamp set
    • June 2021 Paper Pumpkin
  • Rich Razzleberry ink
  • Banner Pick a Punch, Heart and Trio Flower punches
  • Pearl Basic Jewels
  • Dimensionals
I created the matching mini-composition book, directions can be found HERE.


Thursday, February 3, 2022

Kisses & Hugs - Paper Pumpkin Alternative


Stampin' Up! Products
  • Very Vanilla cardstock
    • Card base measures 5 1/2" x 8 1/2"
      • Scored at 4 1/4"
    • Card layer measures 1/4" x 5"
      • Attach to crimped piece
    • Scrap for heart
  • Kisses & Hug envelope
    • Trim side seams and bottom of envelope
    • Flirty Flamingo card layer measures 4 3/8" x 3 1/8"
      • From the front of the envelope
        • Punch large and small heart from this piece 
          • or leftover envelope pieces
    • XOXO card layer measures 4 1/4" x 3" *
      • From the back of the envelope 
    • Flirty Flamingo strip measures 5 1/2"x 1/2"
      • From the envelope flap
      • Crimp
  • Kisses & Hugs stamp set
    • Paper Pumpkin January 2022
  • Flirty Flamingo ink
  • Gold rhinestone of use sequin from kit
  • Dimensionals
* DO NOT USE liquid glue on this, the gold might "bubble" because the paper is thin


Wednesday, February 2, 2022

Magnolia Hope


Stampin' Up! Products
  • Always Artichoke or Mossy Meadow cardstock
  • Petal Pink cardstock
  • Whisper White cardstock
  • Magnolia Lane Designer Series Paper
  • Hold on to Hope stamp set
  • Memento Tuxedo Black ink
  • Stampin' Blends
    • Mossy Meadow
    • Petal Pink
    • Soft Suede
  • Magnolia Memory dies
  • Wink of Stella Clear
  • Rhinestones
  • Dimensionals

Monday, January 31, 2022

Artistic Quick and Easy Card


If you like this card, check out my Expressions in Ink Designer Series Paper Tutorial HERE.

Stampin' Up! Products
  • Berry Burst or Magenta Madness cardstock
  • Basic Black cardstock
  • Whisper White cardstock
  • Expressions in Ink Designer Series Paper
  • Blissful Blooms* and Dragonfly Garden stamp sets
  • Paper Pumpkin August 2018
  • Memento Tuxedo black ink
  • Dragonflies punch
  • Gold rhinestone
  • Dimensionals

Thursday, January 27, 2022

With Sympathy

It seems like the world is literally dying, day by day. Winter is a depressing season; everything seems frail and silent. It seems the older you get, the more you realize life is so very fragile. The second anniversary of the day God called home the first of my parents' legacy. Jennifer, my niece, is coming soon. At a moment's notice, God reminds you what you are missing. You are missing a part of you and it really doesn't get any easier. 

My parents are both gone and they left behind their eight children. Gail, David, Susan, Beth, John, Paul, Jim and Amy. There I am, in the middle, sharing the spot with my brother John. The first of my parents' children, John, passed away today. I really didn't think that today, the sympathy card I was designing would be used so quickly.


Stampin' Up! Products
  • Crumb Cake cardstock
    • Card base measures 5 1/2" x 8 1/2"
      • Scored at 4 1/4"
    • Scrap for sentiment mat
  • Very Vanilla cardstock
    • Card layers measures 5 1/4" x 4" (cut two)
    • Scrap for sentiment
      • Cut with my Brother Scan N Cut
  • Flourishing Phrases stamp set
  • Crumb Cake ink
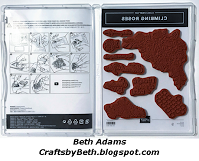
  • Lasting Elegance dies
  • Pearl Basic Jewels (dyed)
  • Dimensionals
#LifeIsTooShort
#RestInPeaceJohn
#MissYouJennifer

Introducing My Bookbinding Triangle Fancy Fold Card


I came up with this layout trying to make a more fancier bookbinding fun fold. Layering triangles is sometimes frustrating. I asked my engineer husband to show me how to make my triangle layers more evenly spaced on another triangle layer. Let me warn you, my wording might make your head spin but I conquered this dilemma.

Stampin' Up! Products
  • Mint Macaron cardstock
  • Basic White cardstock
  • Evening Evergreen cardstock
  • Gold foil sheet
    • Scrap for fern
  • Ever Eden Designer Series Paper*
  • May Good Things Grow stamp set
    • Paper Pumpkin - March 2018
  • Evening Evergreen black ink
  • Forever Flourishing and Layer Ovals dies
  • Gold embossing thread
  • Gold rhinestones
  • Mini Dimensionals
The tutorial is only available with a $25 or more Stampin' Up! product purchase using my Hostess Code. My Hostess Code can be found at the top right of blog (desktop version).  EMAIL me if you are having trouble finding my current Hostess Code.

Tuesday, January 25, 2022

Happy Valentine's Day


Stampin' Up! Products
  • Melon Mambo cardstock
    • Card base measures 8 1/2" x 5 1/2"
      • Scored at 4 1/4"
    • Scrap for hearts
  • Basic White cardstock
    • Card layer (inside) measures 4" x 5 1/4"
    • Scrap for sentiment
  • Gold Foil Sheet
    • Scrap for hearts
  • Rich Razzleberry cardstock
    • Card layer measures 4" x 5 1/4"
    • Card layer (inside) measures 5/8" x 5 1/4"
    • Scrap for hearts
  • Painted With Love Designer Series Paper
    • Card layer measures 3 7/8" x 5 1/8"
    • Card layer (inside) measures 1/2" x 5 1/4"
  • I'll Bee Yours stamp set
    • Paper Pumpkin - January 2020
  • Rich Razzleberry ink
  • Stitched oval die (non SU)
  • Heart and Itty Bitty Accents Punches
  • Pearl Basic Jewel
    • Dyed with Melon Mambo Stampin' Blends
  • Dimensionals

Monday, January 24, 2022

Simply Elegant Note


Stampin' Up! Products
  • Very Vanilla cardstock
    • Card base measures 5 1/2" x 8 1/2"
      • Scored at 4 1/4"
    • Card layer (inside) measures 5 1/4" x 4"
    • Scrap for sentiment
  • Basic Black cardstock
    • Card layer measures 5 1/4" x 4"
    • Card layer (inside) measures 5/8" x 4"
    • Scrap for scallop oval die cut and flowers
  • Basic Gray cardstock
    • Scrap for Story Label punch
  • Simply Elegant Designer Series Paper
    • Card layer measures 5 1/8" x 3 7/8"
    • Card layer measures 5 1/8" x 1 3/8"
    • Card layer (inside) measures 1/2" x 4"
  • Flourishing Phrases stamp set
  • Memento Tuxedo black ink
  • Layering Ovals dies
  • Itty Bitty Accent and Story Label Punches
  • Black ribbon (non SU)
  • Pearl Basic Jewel
  • Dimensionals

Sunday, January 23, 2022

Valentine Workshop - Three Card: Forever Lovely Inspired


Stampin' Up! Products
  • Lovely Lipstick cardstock
    • Card base measures 4 1/4" x 11"
      • Scored at 5 1/2"
    • Crimped layer measures 5" x 3/8"
      • Slightly flatten and use strong adhesive to attach
  • Flirty Flamingo cardstock
    • Card layer measures 3 5/8" x 4 7/8"
  • Old Olive cardstock
    • Scrap for sprigs
  • Very Vanilla cardstock
    • Card layer measures 3 5/8" x 3 1/2"
    • Card layer (inside) measures 4" x 5 1/2"
      • Die cut with Edgelits
      • Trim down to 4" x 5 1/4"
    • Scrap for flowers
  • Forever Lovely stamp set
  • Lovely Lipstick ink
  • Lovely Flowers Edgelits
  • Pearl Basic Jewels
  • Dimensionals
  • Crimper


Stampin' Up! Products
  • Very Vanilla Thick cardstock
    • Card base measures 4 1/4" x 11"
      • Scored at 5 1/2"
  • Sweet Sugarplum cardstock
    • Card layer measures 4" x 5 1/4"
    • Card layer (inside) measures 4" x 1 5/8"
  • Very Vanilla cardstock
    • Card layer measures 3 7/8" x 5 1/8' (after die cutting)
    • Card layer (inside) measures 4" x 5 1/4" (after die cutting)
  • Be Dazzling Specialty Paper
    • Scrap for heart
      • Dyed using Stampin' Blends Rich Razzleberry Dark
  • With All My Heart stamp set
  • Rich Razzleberry ink
  • Lasting Elegance Thinlits
  • Lovely Flowers Edgelits
  • Sweet Sugarplum Ruched ribbon


Stampin' Up! Products
  • Basic White Thick cardstock
    • Card base measures 4 1/4" x 11"
      • Scored at 5 1/2"
  • Basic White cardstock
    • Card layer measure 3 7/8" x 5 1/8"
    • Card layer (inside) measures 4" x 5 1/4"
    • Scrap for sentiment
  • Dark Red glitter paper (non SU)
    • Scrap for hearts
  • Lovely Lipstick cardstock
    • Card layer measures 4" x 5 1/4"
    • Scrap for sentiment mat
  • Forever Lovely stamp set
  • Lovely Lipstick and Memento Tuxedo Black inks
  • Lasting Elegance and Layering Circle dies
  • Dimensionals

Friday, January 21, 2022

Expressions in Ink Designer Series Paper Tutorial Bonus #5


I added another card to my Expressions in Ink Designer Series Paper Tutorial.  For full instructions, click HERE for more information. The tutorial includes the measurements to this card and sixteen other for only $12.95; for a total of SEVENTEEN CARDS. 

Stampin' Up! Products
  • Basic White Thick cardstock
  • Just Jade cardstock
  • Basic White cardstock
  • Expressions in Ink Designer Series Paper
  • Flourishing Phrases stamp set
  • Memento Tuxedo black ink
  • Artistic dies
  • Gold rhinestone
Coordinating Gift Box - Holds 4
Acetate Gift Box

  • Basic White Thick cardstock
  • Gold Foil sheet
  • Just Jade cardstock
  • Expressions in Ink Designer Series Paper
  • Artistic dies

Monday, January 17, 2022

Simply Elegant Designer Series Paper - FREE TUTORIAL


The long awaited Simply Elegant Designer Series Paper Tutorial is available - for FREE.

In order to obtain the tutorial for the nine cards, you have to do the following in this order *

  1. Subscribe to my blog post - link locate in the side dialog box on the right.
  2. Post a comment on any blog post (NOT this one). A comment in an email does not qualify.
  3. Send me an EMAIL requesting the Simply Elegant Tutorial.
* You must complete these three things all using your same current email. Any email request that skips these steps will be ignored.

Happy Stampin'