- Die-cutting cutting pads, two pads + a little extra time = NO WARPING!
- Use one pad as the bottom pad - where the die cuts into the pad
- Use one pad that NEVER gets die cut into, label it DO NOT CUT
- Every other pass through your die cut machine, rotate and flip your pads. Don't switch pad positions, just flip and rotate the pads.
- EVERY OTHER PASS THROUGH is the key. Yes it takes time, but so worth the money. Now you have more money to spend on Stampin' Up! Products. You're welcome!
- Cutting your 12" x 12" Designer Series Paper
- If you need a 3 7/8" layer for one card, cut the DSP at 4" x 12". It is more likely you will use the remaining 4" piece on another project.
- If you need a 2 7/8" layer for one, cut the DSP at 3" x 12". It is more likely you will use the remaining 3" piece of another project
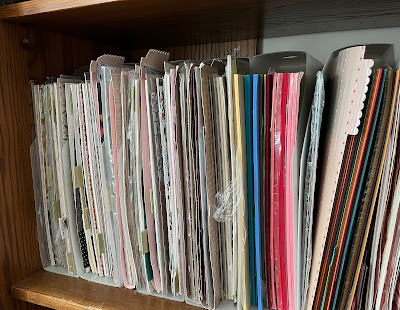
- Storing your Designer Series Paper with scraps
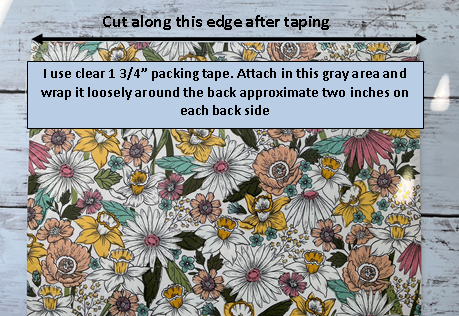
- Before opening your DSP, loosely apply clear packing tape as indicated here. Wrap it around the back just 2" on each side. This allows you to keep your DSP together along with the scraps in the original package. Keep the thicker white cardstock that your DSP comes in for stability while it is stored. I place scraps smaller than 12" x 6" pieces in the back behind the thicker white cardstock.
- I also tape my 8 1/2" x 11" cardstock this way
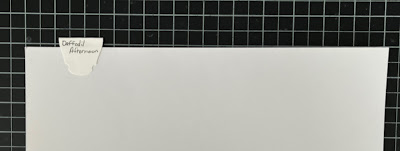
- Create a file type label with any punch you have. Attach it to a 12" x 12" piece of heavy cardstock. My DSP is filed alphabetically in an armoire.
- Color Combinations
- Check the back of a package of SU DSP, the colors that coordinate well are listed there. You don't have to use the DSP to know what colors coordinate.
- Color Coordinating for Dummies - my favorite website, Create, Ink, Color Lab
- Know What You Have
- Create a digital document with digital pictures of your stamps and dies
- Add in descriptions
- Use the "search" feature in that document
- Check out one page of my stamp inventory HERE
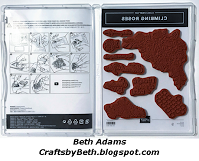
- Stampin' Up! now includes a reverse image of the stamp set on the inside of their cases. Make all your older stamp cases look the same!
- I use to save the left over rubber in the case so it was easy to make sure I had returned all the stamps to the case. Doesn't work for the new stamps. I needed an easy way to insure that I placed all the stamps back. I scanned the front of the Stampin' Up! image sheet and flipped the picture so I could insert it into the back of the case. Added my stamps, and WOW I'm a genius! Some computer skills are necessary. The step by step picture tutorial can be downloaded HERE.
- Cling Mount Stamp Labels - Don't throw away the scraps.
- The new Stampin' Up! cling mount stamps now STAY on your acrylic blocks. Why not make your older Clear Mount stamps STAY by using the scraps?!
- Try Before You
BuyMake - Use some of your long forgotten DSP that you really don't like but can't part with, use it to create samples.
- When I challenge myself to make fun fold cards, I also use scrap cardstock and pattern paper. I design the layout and cut my cardstock. If I like a style, I write down the card measurements and keep them together for future use. Look at the messy way I keep this tip.
- Ribbon Embellishments - Do you struggle like I do making your ribbon embellishment behind a sentiment?
- I use Press'n Seal to create ribbon and flower layout designs. Simply create your ribbon zigzag, with the sticky side down of the Press'n Seal, apply that to your ribbon. Apply adhesive to where you want to place the embellishment and press your work onto your card. Gently pull back the Press'n Seal and presto - truly a work of art.


