Stampin' Up! Products
- Calypso Coral cardstock
- Card base measures 8 1/2" x 5 1/2"
- Scored at 4 1/4"

- Card layer measures 3" x 3 7/8"
- Dimensionals are placed under this layer
- Card layer (inside) measures 4" x 5 1/4"
- Basic White cardstock
- Card layer measures 3 7/8" x 5 1/8"
- Card layer (inside) measures 4" x 5 1/4"
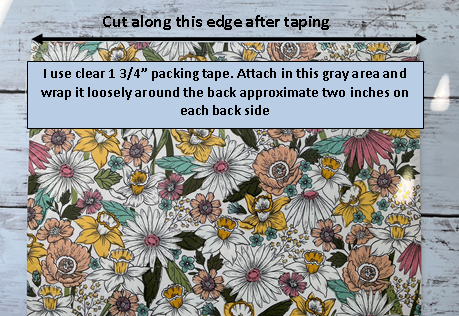
- Flowering Fields Designer Series Paper
- Card layer measures 3 3/8" x 3 1/8"
- Card layer (inside) measures 4" x 5 1/4"
- Special Moments stamp set
- Memento Tuxedo Black ink
- Mossy Meadow Braided Linen Thread
- Gold rhinestones
- Dimensionals