
Monday, October 25, 2010
M&M Candy Stixs - Alabama and Auburn Fans
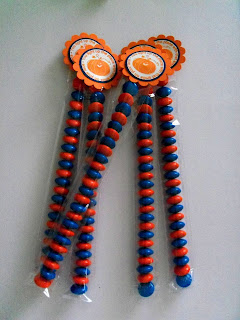
I have M&M Candy Stixs leftover from the Heritage Festival. Originally $1.50, now $1.25 each. Each stix has approximate 22 - 24 M&M pieces
Auburn

Auburn
- Halloween - nine available - (Pumpkin reads You light up the place)

Alabama
Seven available (reads "for you") - houndstooth paperSOLDHalloween - Two available (Dracula reads Fangs for thememories)

Wednesday, October 13, 2010
Cardinal Post-it-Note Desk Holder
I am finished making everything I plan on taking to the Heritage Festival this weekend. This was my last creation.
 Stampin' Up! Products

- Two-Step Bird Extra-Large Punch
- Decorative Label
- Basic Black, Garden Green and Riding Hood Red cardstock
- Riding Hood Red ink
- Basic Black Stampin' Write Marker
- Stamping Sponge
- Holiday & Wishes stamp set
- Uniball Signo Gel Pen - white
- Multipurpose Liquid Glue
- Dimensionals

Other Products
- Patterned paper
- Post-it-Note
- 4" x 6" acrylic picture frame
- Evergreen hand punch
YES, you can create this cardinal, follow steps in my tutorial - $2.50.
Upon payment, your tutorial will be sent to you by email. I usually check my account twice a day. The email will be sent to the one you have with Paypal, unless otherwise noted. Thank you.
Monday, October 11, 2010

Tuesday, October 5, 2010
Just Believe - My New Top Pick
 Stampin' Up! Products
- Basic Black cardbase - 4 1/4" x 5 1/2"
- Sweet Pea Designer Series Paper (DSP) - 4" x 5 1/4"
- Basic Black cardstock - 3 3/4" x 5"
- Sweet Pea DSP - 3 1/2" x 4 3/4"
- Stazon Black Ink
- Just Believe and Sincere Salutations stamp sets
- Satin ribbon - 5/8"
Monday, October 4, 2010
Fall Colors - Thinking of You
My favorite season is Fall...even though Winter (big sigh!) always follows.


Stampin' Up! Products
- Chocolate Chip textured cardbase - 5 1/2" x 4 1/4"
- Tangerine Tango - 4" x 3 3/4"
- Chocolate Chip cardstock - 3 3/4" x 3 1/2"
- Whisper White cardstock - 3 1/2" x 3 1/4"
- Upsy Daisy and Sincere Salutations stamp sets
- Chocolate Chip ink
Other Products
- Satin ribbon 1/2"
Sunday, October 3, 2010
Joy Fold Card
If you want to give a unique greeting card, Chris Twina created a great video tutorial on the Joy Fold card. The video with step by step instructions including measurements can be found here.
I am so grateful for the talented women that share and create wonderful tutorials. Comments are always appreciated, please leave Chris a comment or a thumbs up on her YouTube webpage.
The cardbase with the stamped image, tucks underneath the bird. This first card opens up in the opposite way from Chris's video.

This card opens the same way as the card in Chris's video.

I am so grateful for the talented women that share and create wonderful tutorials. Comments are always appreciated, please leave Chris a comment or a thumbs up on her YouTube webpage.
The cardbase with the stamped image, tucks underneath the bird. This first card opens up in the opposite way from Chris's video.

Stampin' Up! Products
- Really Rust cardstock
- Main cardbase is cut at 8 1/2" x 4 1/4" and scored at 5 1/2"
- Secondary cardbase is cut at 8" x 3" and scored at 4"
- Autumn Vine Designer Series Paper (DSP)
- Outside flap is cut at 2 3/4" x 4"
- Inside of card is cut at 5 1/4" x 4"
- Whisper White cardstock
- Two pieces cut at 3 3/4" x 2 3/4"
- Stamped Images
- Elements of Style stamped in Really Rust ink
- Sincere Salutations (Get Well soon) stamped in Chocolate Chip
- Two-Step Bird Extra-Large punch
 Body - More Mustard cardstock
- Wing - Autumn Vine DSP
- Twig - Sage Shadow cardstock
- Dimensionals

This card opens the same way as the card in Chris's video.

Stampin' Up! Products (measurements are the same as above)
- Old Olive and Whisper White cardstock
- Green Tea Designer Series Paper
- Bird is made using Baja Breeze cardstock
- Elements of Style is stamped in Old Olive ink
- Sincere Salutations is stamped in Night of Navy ink
*Helpful hint - Make sure the bird's tail does not stick outside the cardbase. You can already see the "wear and tear" on my poor little bird.
Saturday, October 2, 2010
Just Believe
I was inspired to create this card after seeing a card made by Diane Gilbert. This is a new stamp set by Stampin' Up! - definitely one of my Top Picks!
Stampin' Up! Products
 So Saffron cardbase - 4 1/4" x 5 1/2" (folded)
- Sweet Pea Designer Series Paper - 4" x 5 1/4"
- So Saffron cardstock - 2 3/4" x 4 3/4"
- Whisper White cardstock - 2 1/2" x 4 1/2"
- Taken with Teal cardstock butterflies
- Just Believe and Thoughts and Prayers stamp sets
- Old Olive Ink
- Old Olive 1/4" grosgrain ribbon
- Large and Scallop Oval punches
- Beautiful Wings Sizzix Embosslit die
- Dimensionals
- Multipurpose Liquid Glue

Tuesday, September 28, 2010
Sunday, September 26, 2010
Thank You for your Kindness
Stampin' Up! Products
- Old Olive cardbase - 5 1/2" x 4 1/4"
- Whisper White cardstock - 4 1/4" x 3 1/2"
 Old Olive layer - 4 3/8" x 3 5/8"
- Dusty Durango layer - 4 5/8' x 3 7/8"
- Old Olive ink
- Dusty Durango and Old Olive Stampin' Write markers
- Occasional Quotes and Inspired by Nature stamp sets
- Scallop Oval and Small Oval punches
- Square Lattice embossing folder (front of card)

Sunday, September 19, 2010
United Methodist Women of Jasper, Alabama
A collection of recipes by the First United Methodist Women of Jasper, Alabama, is available for purchase. The perfect gift for the upcoming holidays.
 Table of Contents (approximately)
This is more than your typical church cookbook. This is a three ring binder with indexes and a bookstand to rest your cookbook on for easy reading while you are preparing your desserts, meals, etc.
 The outside of the book is a cleanable vinyl and measures 7" x 9 1/4"

Also included in this cookbook are the following pages of Helpful Cooking Hints
The Purpose of United Methodist Women
The organized unit of United Methodist Women shall be a community of women whose purpose is to know God and to experience freedom as whole persons through Jesus Christ; to develop a creative supportive fellowship; and to expand concepts of mission through participation in the global ministries of the church.
 Cookbook was printed by Morris Press Cookbooks
SHIPPING: This book will be shipped Media Mail to save costs for you, if you need it sooner – just let me know.
Shipping discount when purchasing more than one. Please email me first before clicking Buy Now.

- Appetizers & Beverages - 83 Recipes
- Soups & Salads - 120 Recipes
- Vegetables & Side Dishes - 93 Recipes
- Main Dishes - 138 Recipes
- Breads & Rolls - 34 Recipes
- Desserts - 121 Recipes
- Cookies & Candy - 49 Recipes
- This & That - 15 Recipes
This is more than your typical church cookbook. This is a three ring binder with indexes and a bookstand to rest your cookbook on for easy reading while you are preparing your desserts, meals, etc.


Also included in this cookbook are the following pages of Helpful Cooking Hints
- Pantry Basics - what you need for a well-stocked pantry
- Herbs & Spices
- Hints for Baking Breads
- Baking Desserts - perfect cookies, pies and cakes
- Cooking time for fruits and vegetables
- Napkin Folding
- Measurements and Substitutions
- Food Quantities - Preparing for a large crowd? This will help you figure serving proportions
- Quick Fixes for baking disasters
- Counting calories
The Purpose of United Methodist Women
The organized unit of United Methodist Women shall be a community of women whose purpose is to know God and to experience freedom as whole persons through Jesus Christ; to develop a creative supportive fellowship; and to expand concepts of mission through participation in the global ministries of the church.

SHIPPING: This book will be shipped Media Mail to save costs for you, if you need it sooner – just let me know.
Shipping discount when purchasing more than one. Please email me first before clicking Buy Now.
Saturday, September 18, 2010
Getting Ready for Heritage Festival
I have always wanted to have a booth at a craft show or art festival. On October 16, I will have my first craft booth at the Heritage Festival in Jasper, Alabama. To read more about the Heritage Festival, click here.
 I love making cards and paper crafting. Over the past few years I have made so many paper craft items that my craft closet and drawers are full. I have over six shoe boxes full of handmade greeting cards. I hope my first craft booth is a success.
When I decided to have booth at this year's festival, I dug out the remaining houndstooth patterned paper and created a Post-it-Note holder/covers that I hope will be a BIG hit.
 A friend suggested I should offer to personalize with an initial. I actually like the Post-it-Note holder with the flower. What do you think? Please post your vote in my comments section.
View my other Post-it-Note covers, click here. Instructions with measurements can be found here.
 I love making cards and paper crafting. Over the past few years I have made so many paper craft items that my craft closet and drawers are full. I have over six shoe boxes full of handmade greeting cards. I hope my first craft booth is a success.
As you well know, I love Stampin' Up! products. I purchased the Night and Day Speciality Designer Series Paper a few years ago. In this paper pack, one of the designs is black and white houndstooth. When I saw the paper, I knew exactly how I would put it to good use. The first item I created using this paper was an altered mini composition book. When a Crimson Tide fan saw it, she had to have it!

View my other Post-it-Note covers, click here. Instructions with measurements can be found here.
Friday, September 17, 2010
My Creepy Friends
I have missed my “creepy” friends, so I am bringing them back in a more stylish manner.
 Stampin’ Up! Products
Other Products
 Stampin’ Up! Products
- Almost Amethyst, Basic Black, Kiwi Kiss, Real Red and Whisper White cardstock
- Matchbox Bigz XL Die for Big Shot
- Basic Black Stampin’ Write marker
- Uni-ball® Signo Gel Pen
- Star and 1/2” Circle punch
- Dimensionals
Other Products
- 1/8” hole punch
- 4 Hershey Nuggets
- Patterned paper 1” x 3 1/2” are wrapped around the Nuggets
Friday, September 3, 2010
Houndstooth Happy Birthday
I used Stampin' Up!'s Sweet Pea Designer Series Paper (retired) on this card. I love the houndstooth pattern so much that I HAD to buy a houndstooth embossing folder (non Stampin' Up!)
 Stampin' Up! Products

- Chocolate Chip card base measures 5 1/4" x 4"
- Sweet Pea DSP 4" x 3"
- Bashful Blue cardstock 4" x 2 5/8" before using border punch
- Sentiment is from the Well Scripted stamp set
- Chocolate Chip ink
- Dimensionals
- Houndstooth embossing folder
- 5/8" satin ribbon
- Border punch
Thursday, September 2, 2010
One Step Further
This picture shows the finishing touches to my cards shown in my posting from yesterday. Stamping the inside of cards and the outside of envelopes adds pizzazz to a handmade card.
 Stampin' Up! Products

- Whisper White cardstock liner measures 5 1/4" x 4"
- Medium Whisper White envelopes
- Corner Rounder was used on the bottom edge of the liner
- Itty Bitty Buds stamp set
- Flourish was stamped first in Old Olive
- Flowers were stamped using Really Rust ink
The Holiday Mini is Here!
SPECIAL DISCOUNT* now through September 15

*Discount is only available through me

It is never too early to start on Christmas projects!! Download your copy here.
The new holiday mini has so many great new products. Halloween is just around the corner, now is the time to order all your crafting supplies for the fall holidays.
Now through September 15 - Buy More, Save More Discount on all purchases from the Holiday Mini Catalog .
- Purchase $35, receive a 5% discount
- Purchase $75, receive a 10% discount
- Purchase $100, receive a 15% discount
Wednesday, September 1, 2010
Fall Flowers - Thanks Gift Box and Cards
I am pleased how this set of four cards and card box turned out. I will be using this as a hostess gift.
 When I started digging through my wonderful Stampin' Up! Designer Series Paper (DSP), the Fall Flowers pack caught my eye. I love Stampin' Up!'s paper, no guess work in figuring out what cardstock will match the paper. The names of the coordinating colors can be found in the catalog along with the description of the DSP pack. The Fall Flowers DSP is retired; however, every year Stampin' Up! comes out with new patterns and I have never been disappointed with the fall designs.
 I designed the card and was happy with the finished product so I continued to make three additional cards. I couldn't stop there...I knew they would work perfectly with the card box.
Stampin' Up! Products
Other Products
* Update 08/10/2012 - Paula's blog has been removed and she offered no further assistance.

 I designed the card and was happy with the finished product so I continued to make three additional cards. I couldn't stop there...I knew they would work perfectly with the card box.
 Stampin' Up! Products
- Sahara Sand card base is 5 1/2" x 4 1/4" (folded)
- Old Olive cardstock measures 5 1/4" x 4"
- Fall Flowers DSP measures 2 1/8" x 3 3/4" (top section)
- Patterns Pack Designer Series Paper III measures 3" x 3 3/4" (bottom section)
- Corner Rounder was used on the bottom edges
- Thank You Kindly stamp set
- Basic Black ink
- Really Rust flowers were made using the Birds & Blooms Sizzix die (exclusive to Stampin' Up!)
- Old Olive leaves were made using the 5-Petal Flower punch
Other Products
- White brad
- 3/8" ribbon
- Thanks was first stamped on Really Rust DSP, using Basic Black ink
- Patterned papers were mounted onto the Old Olive cardstock
- Ribbon was tied in a knot and wrapped around the back of Step #2
- Flower and leaves were put together with a brad and placed through layers in Step #2, hiding the brad prongs
* Update 08/10/2012 - Paula's blog has been removed and she offered no further assistance.
Tuesday, August 31, 2010


Monday, August 30, 2010
Pocket Silhouettes
This stamp set is so versatile...it is a MUST have stamp set!

Stampin' Up! Products
- Always Artichoke card base 11" x 4 1/4", scored along 5 1/2"
- First layer - More Mustard cardstock cut at 5 1/4" x 4"
- Second layer - Autumn Traditions Designer Series Paper cut at 5" x 3 3/4"
- Stamped image Whisper White cardstock cut at 2 1/2" x 1 5/8"
- Pocket Silhouettes stamp set using Soft Suede ink
- More Mustard layer cut at 2 3/4" x 1 7/8"
- Always Artichoke layer cut at 3" x 2 1/8"
- Flowers (Always Artichoke, Elegant Eggplant and More Mustard) were made using the Trio Flower punch and a stylus (tool for dry embossing and scoring)
- Sentiment is from the Very Versatile (retired) stamp set, Elegant Eggplant ink on Whisper White cardstock
- The sentiment was punched out using the Word Window Punch
- Next layer (More Mustard) was punched out using the Modern Label punch
- Next layer (Elegant Eggplant) was cut using the Movers & Shapers Modern Label die
- All layers were glued together, Elegant Eggplant 1/4" grosgrain ribbon was knotted and wrapped around the layers. Final step was to add these layers to the cardbase.
- Using Elegant Eggplant ink, the Pocket Silhouette imaged was stamped at the bottom left side of the envelope and inside layer (Whisper White cardstock cut at 5 1/4" x 4")
- Multipurpose Liquid Glue
Other Products
- Rhinestones
- Glue pen
We have Two Winners!
Using http://www.random.org/ and the nine comments on my blog posting: Win Blog Candy.
True Random Number Generator
Min: 1
Max: 6
Result: 1
The winner is: Susan B.
Susan said . . .
Heck yeah! I'll post a comment!
August 25, 2010 11:26 AM
Two winners you ask?? I was so touched by Yvonne's comment, that I am sending Yvonne one of my Post-it-Note covers.
Yvonne, you are a winner!
Yvonne said . . .
Hi Beth
I can't enter your giveaway, as I am in Australia, but I just wanted to say what a wonderful idea these are.
And I appreciate you sharing the directions so we can give it a go ourselves.
I've enjoyed exploring your site. You have some great projects.
I've now signed up to be a follower.
Thanks for the inspiration.
August 27, 2010 7:07 AM
Thank you everyone for participating in my blog giveaway!
Subscribe to:
Posts (Atom)